Implementing Google OAuth with AWS in Ionic
Handling password/email authentication can be bothersome for both the users and the developers.
Open Authorization (OAuth) comes to the rescue by allowing us to directly login using popular social media accounts, delegating the authentication process to them and receiving more information from their side.
However, this can be a tough task because every providers have their own rules. In this tutorial we mix together AWS, Google and Ionic.
At first it doesn't look really hard because everything is explained there.
However, the documentation is quite generic.
As you can guess, the following content is an Ionic laser-focused walkthrough.
This project uses the Ionic/AWS stack, it's crucial to have a look at the first tutorial to understand how to set up the project and how everything is working.
The authentication process is separated in two phases:
- The authentication is done on Google's side
- If there is no error, an ID token is returned and we can use this token to trigger AWS Cognito authentication
Setting up Google's side
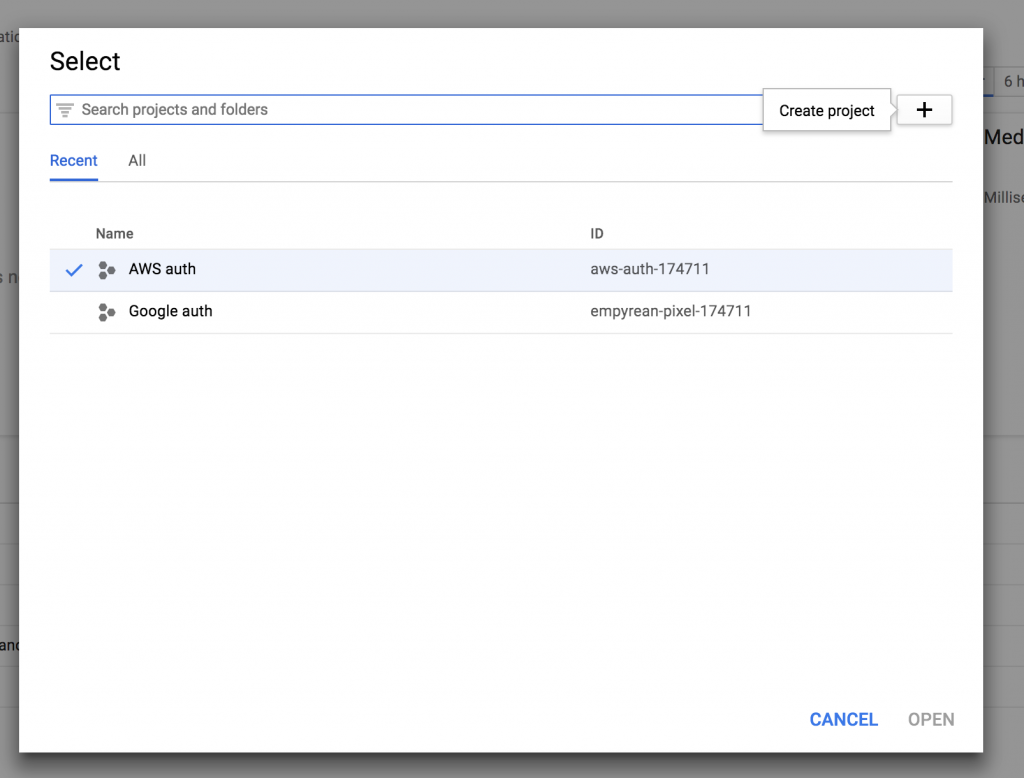
A new project is required in the Google Developer Console there:

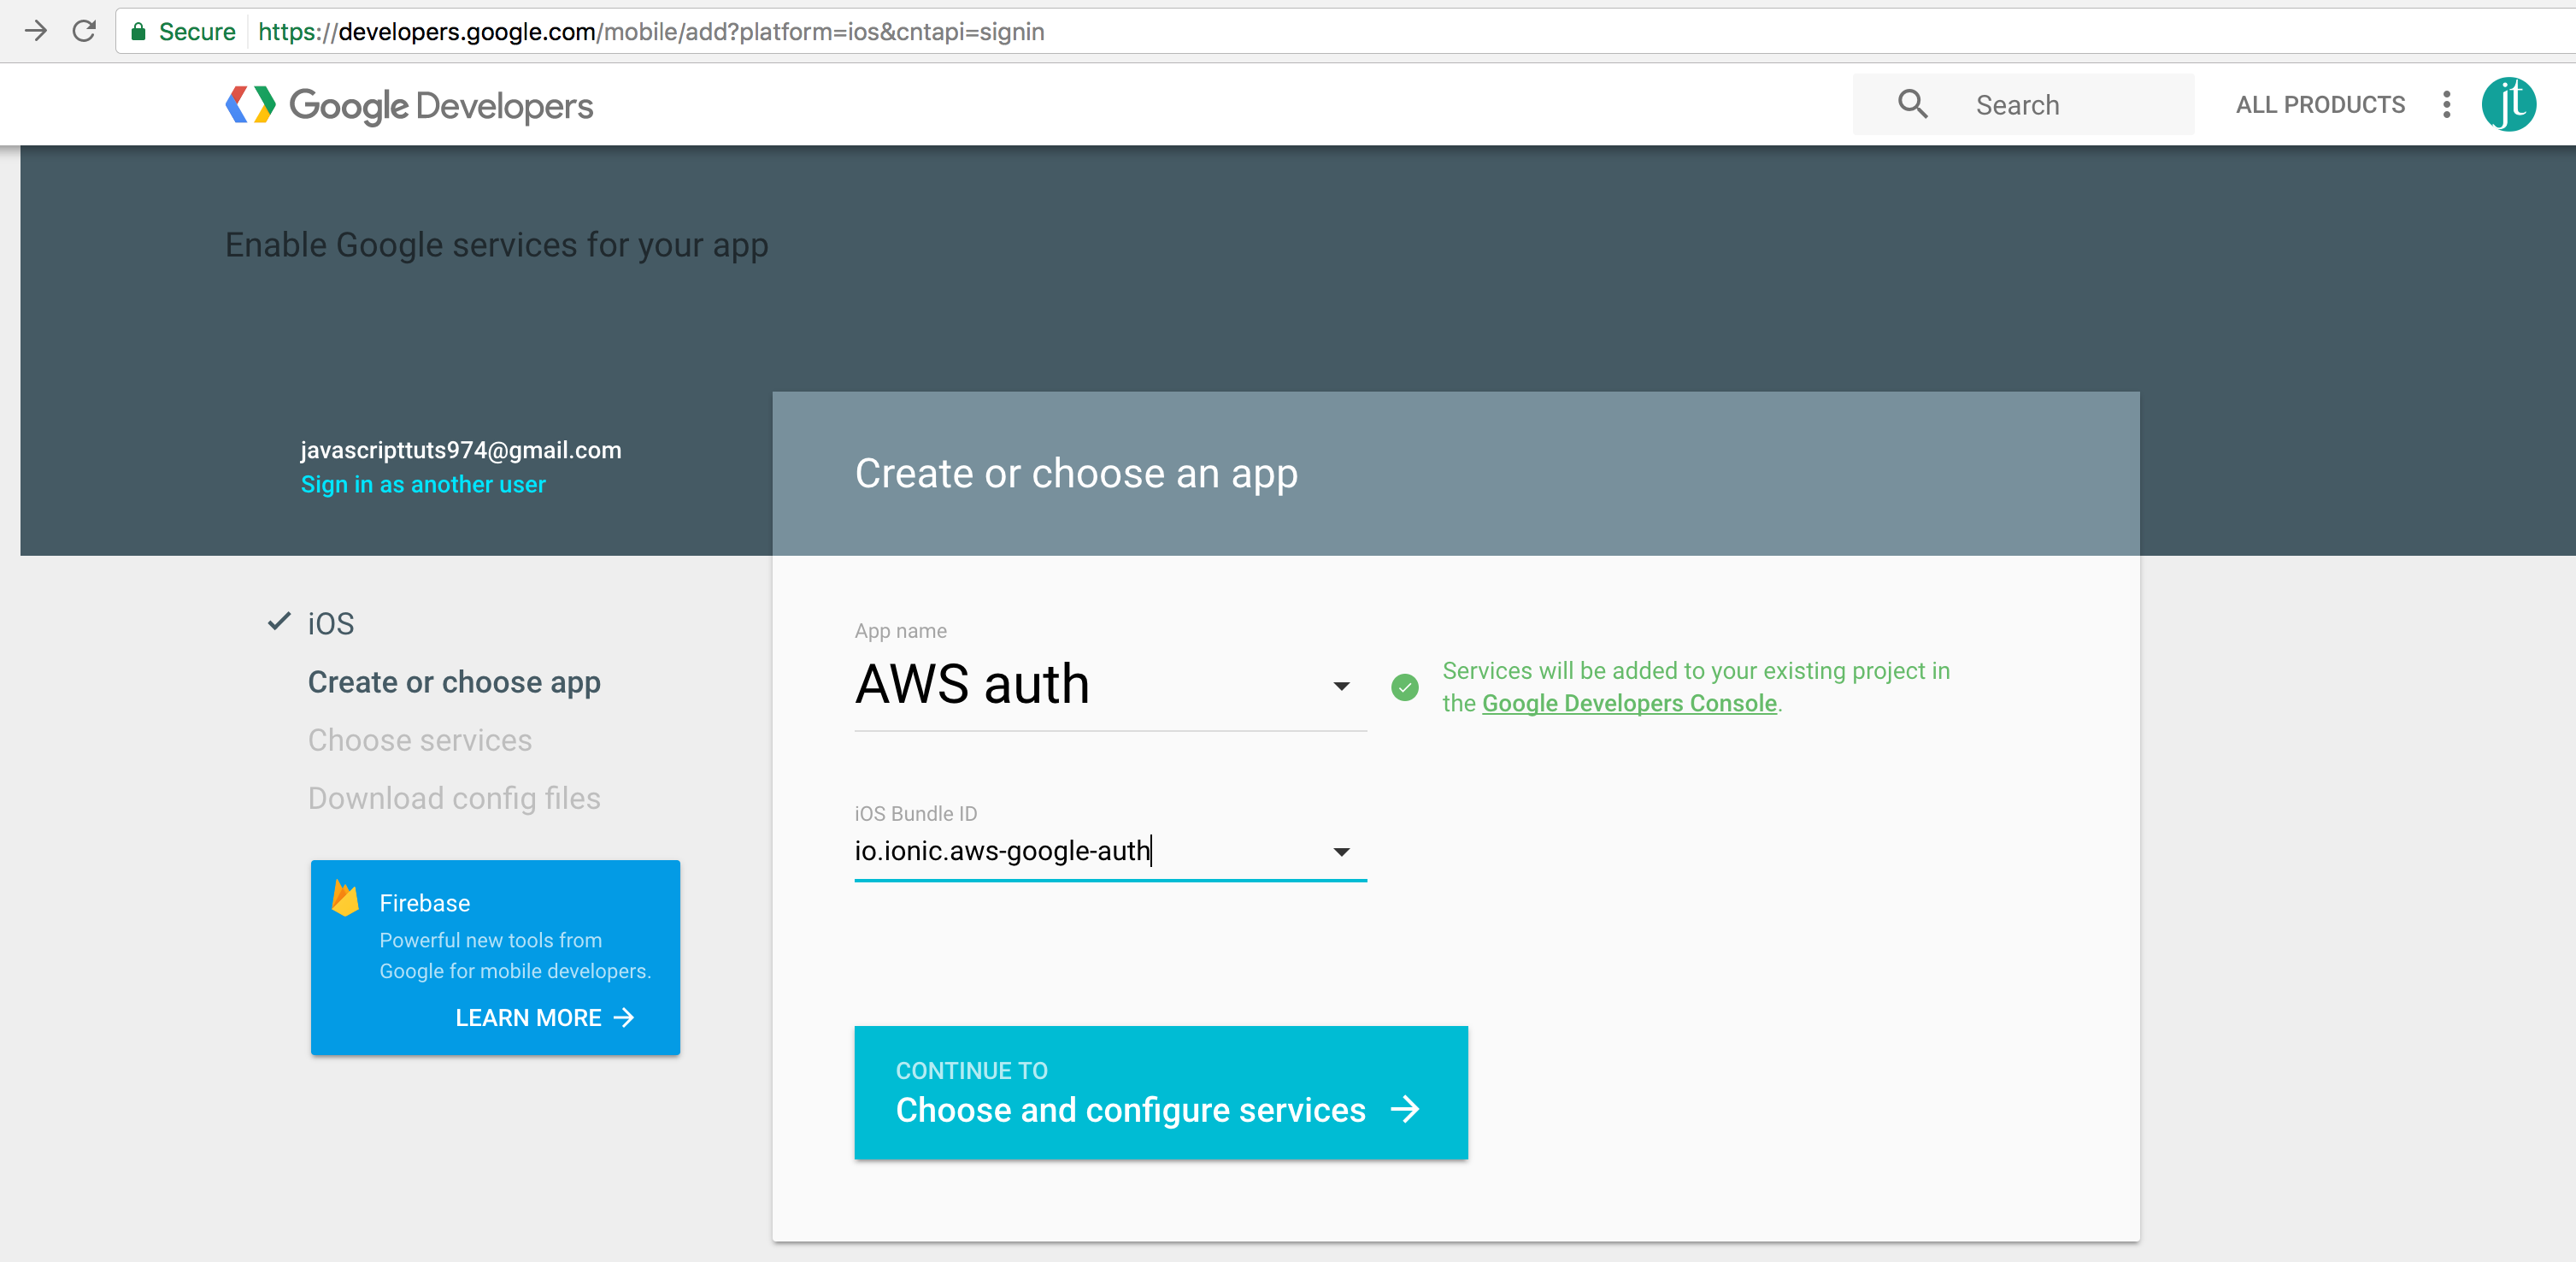
Creating credentials for the google project there:

We now have the configuration file named GoogleService-Info.plist, with the important IDs:

The REVERSED_CLIENT_ID will first be used when installing the Ionic Native Google Plus plugin:
ionic cordova plugin add cordova-plugin-googleplus
 --variable REVERSED_CLIENT_ID=
  com.googleusercontent.apps.213325300302-0pbjkols105gqenvckdpu54ejba18pir
npm install --save @ionic-native/google-plus
Before diving into the code, we have to add Google's client ID to AWS.
Head back to the AWS Mobile Hub.
Setting up AWS's side
The Cognito Identity Pools is reachable in the Resources section:

Then click on Edit identity pool:

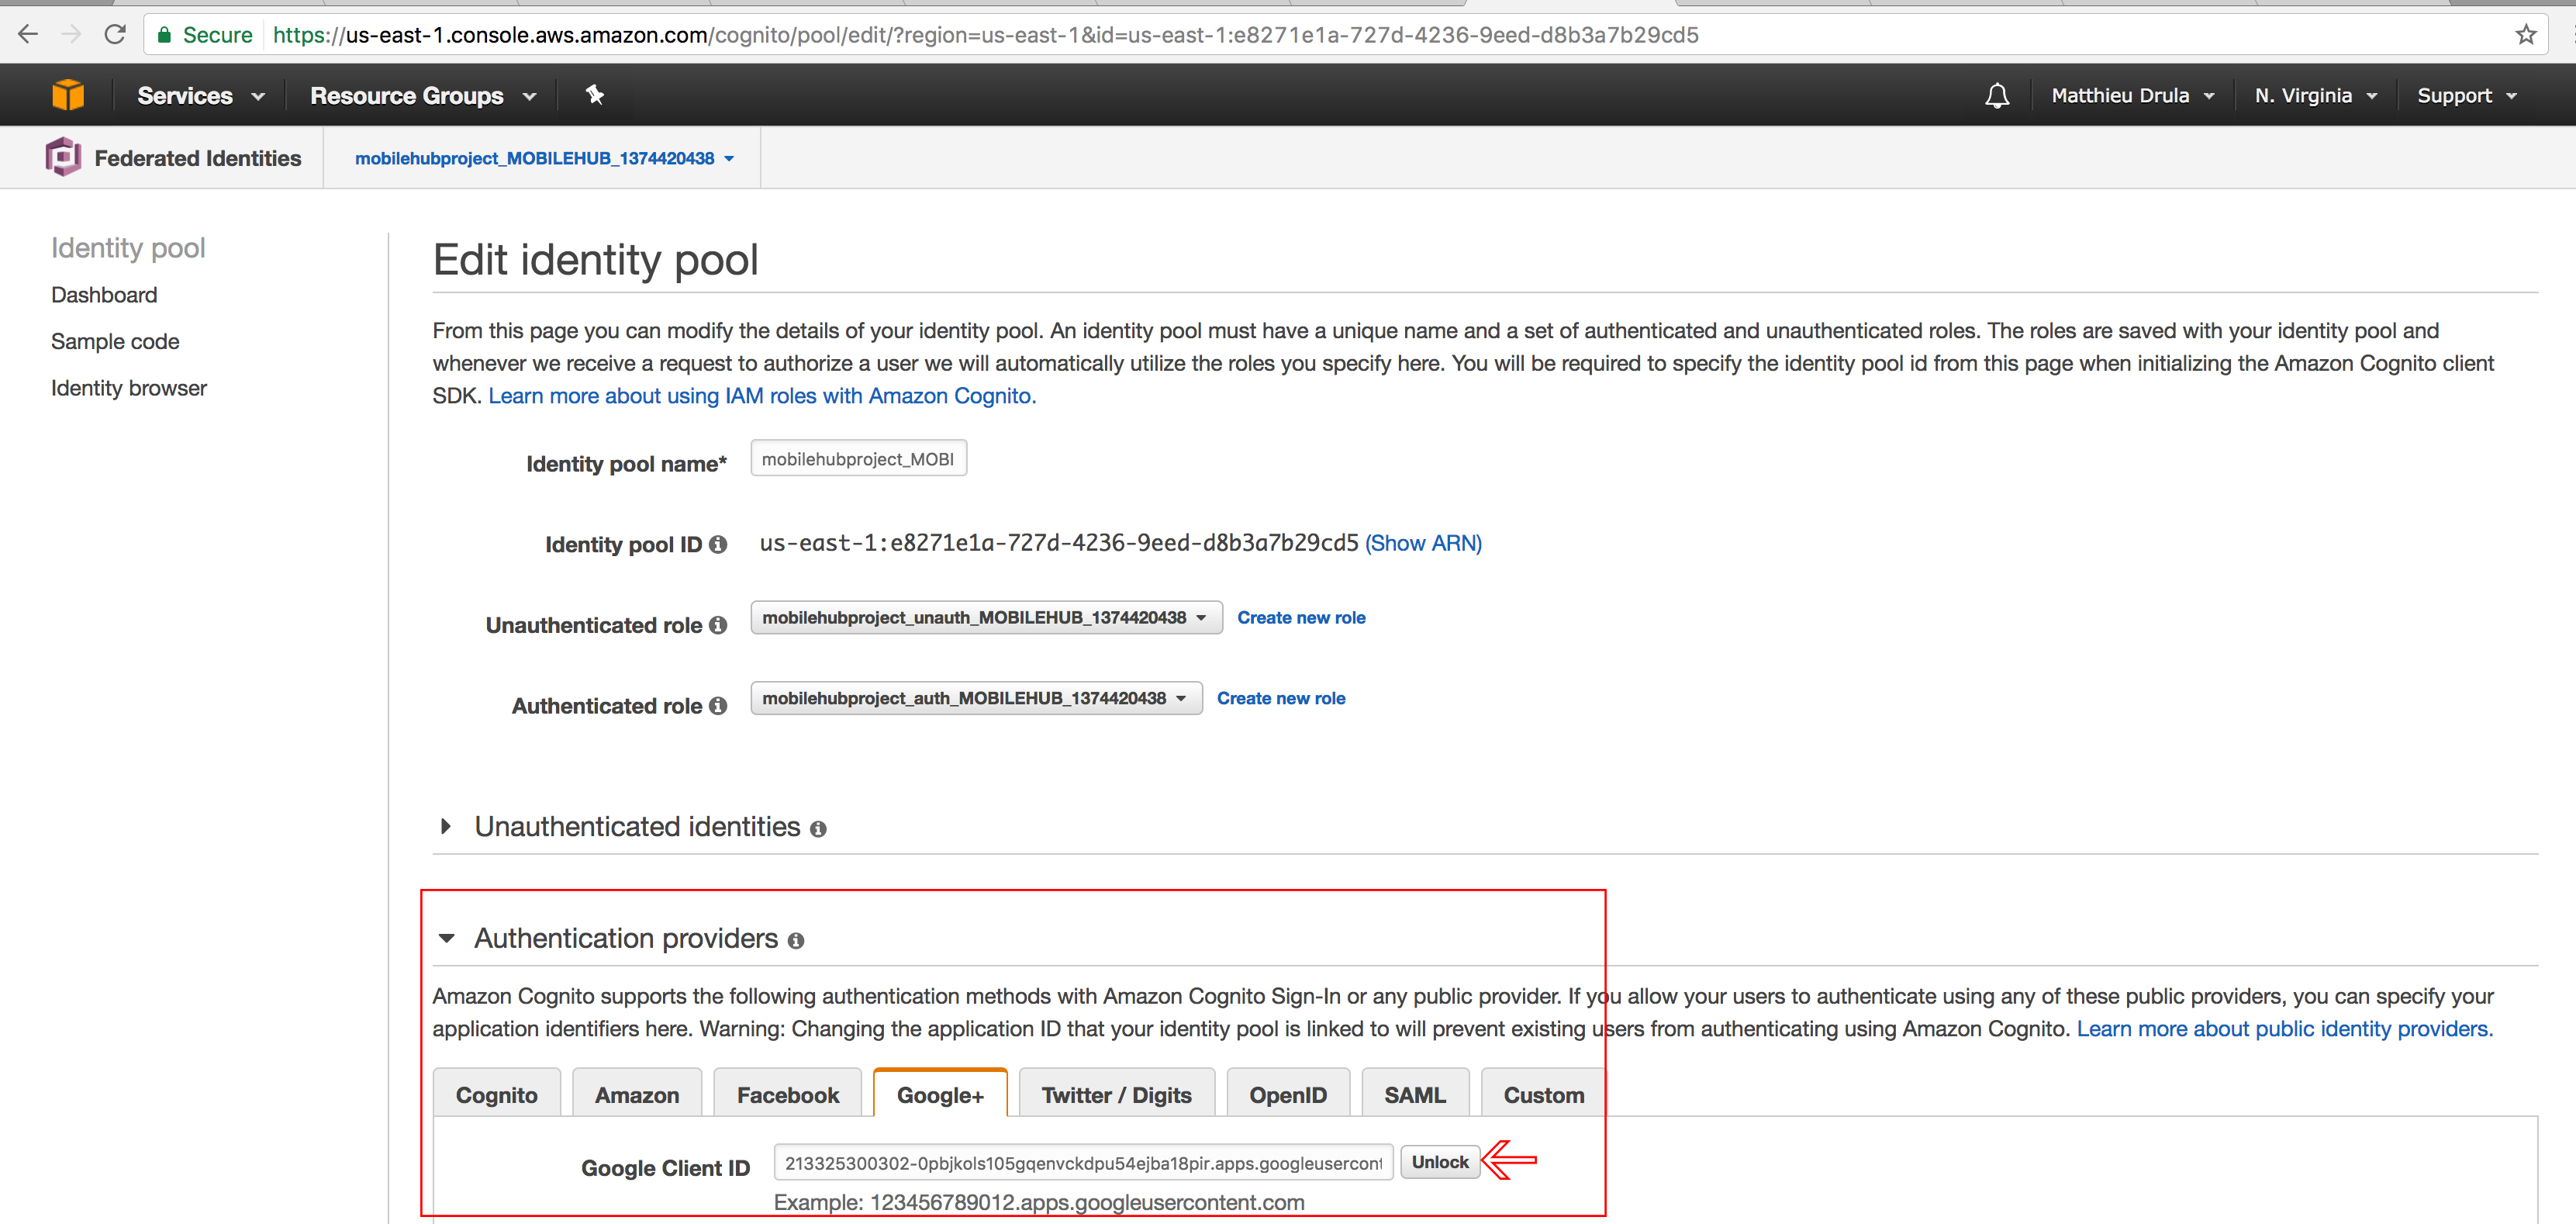
Scrolling down and collapsing the Authentication providers section:

Google's client ID must be placed here so Cognito can accept tokens from this provider.
Remember, it's the one from the GoogleService-Info.plist file:

Let's code
This Ionic Native Google Plus plugin must be declared as a Provider in the app.module.ts file:
import { GooglePlus } from '@ionic-native/google-plus';
...

@NgModule({
  ...,
  providers: [
    ...
    GooglePlus
  ]
})
export class AppModule {}
The login.html file can be cleaned up as follow:
<ion-content>
  <button ion-button (click)= "loginWithGoogle()">
    Connect with google
  </button>
</ion-content>
One button that will trigger a custom loginWithGoogle method.
Before diving deeper in the Login Page, we will follow Ionic's team architecture and write our code in the Cognito Provider located in the aws.cognito.ts file, starting by adding the makeGoogleCredentials method:
  makeGoogleCredentials(idToken, username) {
    AWSCognito.config.credentials = new AWS.CognitoIdentityCredentials({
      IdentityPoolId: aws_cognito_identity_pool_id,
      Logins: {
        'accounts.google.com': idToken
      }
    });
     // Obtain AWS credentials
     AWSCognito.config.credentials.get((error) => {
        // Access AWS resources here.
       console.log('We are in', error);
       if (!error) {
         const user = this.makeUser(username);
         console.log(user);
       }
     });
  }
AWSCognito will recreate the credentials taking into account the idToken parameter.
The Logins property here specify that the user comes from a Google domain.
Once the credentials are created, the get method will check if everything is correct.
If there is no error, we can use the makeUser method that the Ionic's team has created for us and have a verified Cognito User.
Congratulations, you have done the hardest part!
All we need to do is acquiring the token from Google and pass it there.
Moving on to the User Provider located in the user.ts file:
  loginAwsGoogle(idToken, username) {
    this.cognito.makeGoogleCredentials(idToken, username);
  }
Just like the login method, the Cognito Provider is used to login.
Our Providers are set, we can go the login.ts file now:
import { GooglePlus } from '@ionic-native/google-plus';
...

export class LoginPage {
  public loginDetails: LoginDetails;

  constructor(public navCtrl: NavController,
              public user: User,
              public loadingCtrl: LoadingController,
              public googlePlus: GooglePlus) {
    this.loginDetails = new LoginDetails();
  }
}
First action: importing the GooglePlus Native plugin and stocking it in a googlePlus property.
Finally we can create the loginWithGoogle method that will be triggered when tapping on the button in the homepage:
loginWithGoogle() {
    this.googlePlus.login({})
      .then((res) => {
        this.user.loginAwsGoogle(res.idToken, res.displayName);
      })
      .catch(err => console.error(err));
  }
Just five lines of code!
Using the googlePlus property’s login method, if everything is good, the response contains idToken and displayName that we pass to our providers.
And we are done.
Once the button is tapped, the Cognito User is created:
{"username":"Matthieu Drula",
 "pool":{"userPoolId":"us-east-1_NFGTp54nd",
 "clientId":"42toitq6gg1sqadmie7ek0ceoe","client":
{"config":{"credentials":{"expired":false,
"expireTime":"2017-07-26T21:17:41.000Z",
"accessKeyId":"ASIAIA76VUO3Z5L7G3FA",
"sessionToken":
"AgoGb3JpZ2luEKD//////////wEaCXVzLWVhc3QtMSKAAmaHSx4FN6PKI2OpdAvVpOpQe ... }
And a new Google Sign-In measure should now appear in the identity homepage:

Conclusion
If AWS Cognito had a loginWithGoogle method that would be way easier.
Setting up Google OAuth with AWS is quite a mental gymnastic. First creating the Google Credentials then linking them with AWS Cognito in the web interface and finally using the Ionic Native Google Plus plugin in the code to pass Google’s ID token to AWS Cognito.
Half of the work was done by the Ionic team so remember to go there to see how the installation is done.


